-40%
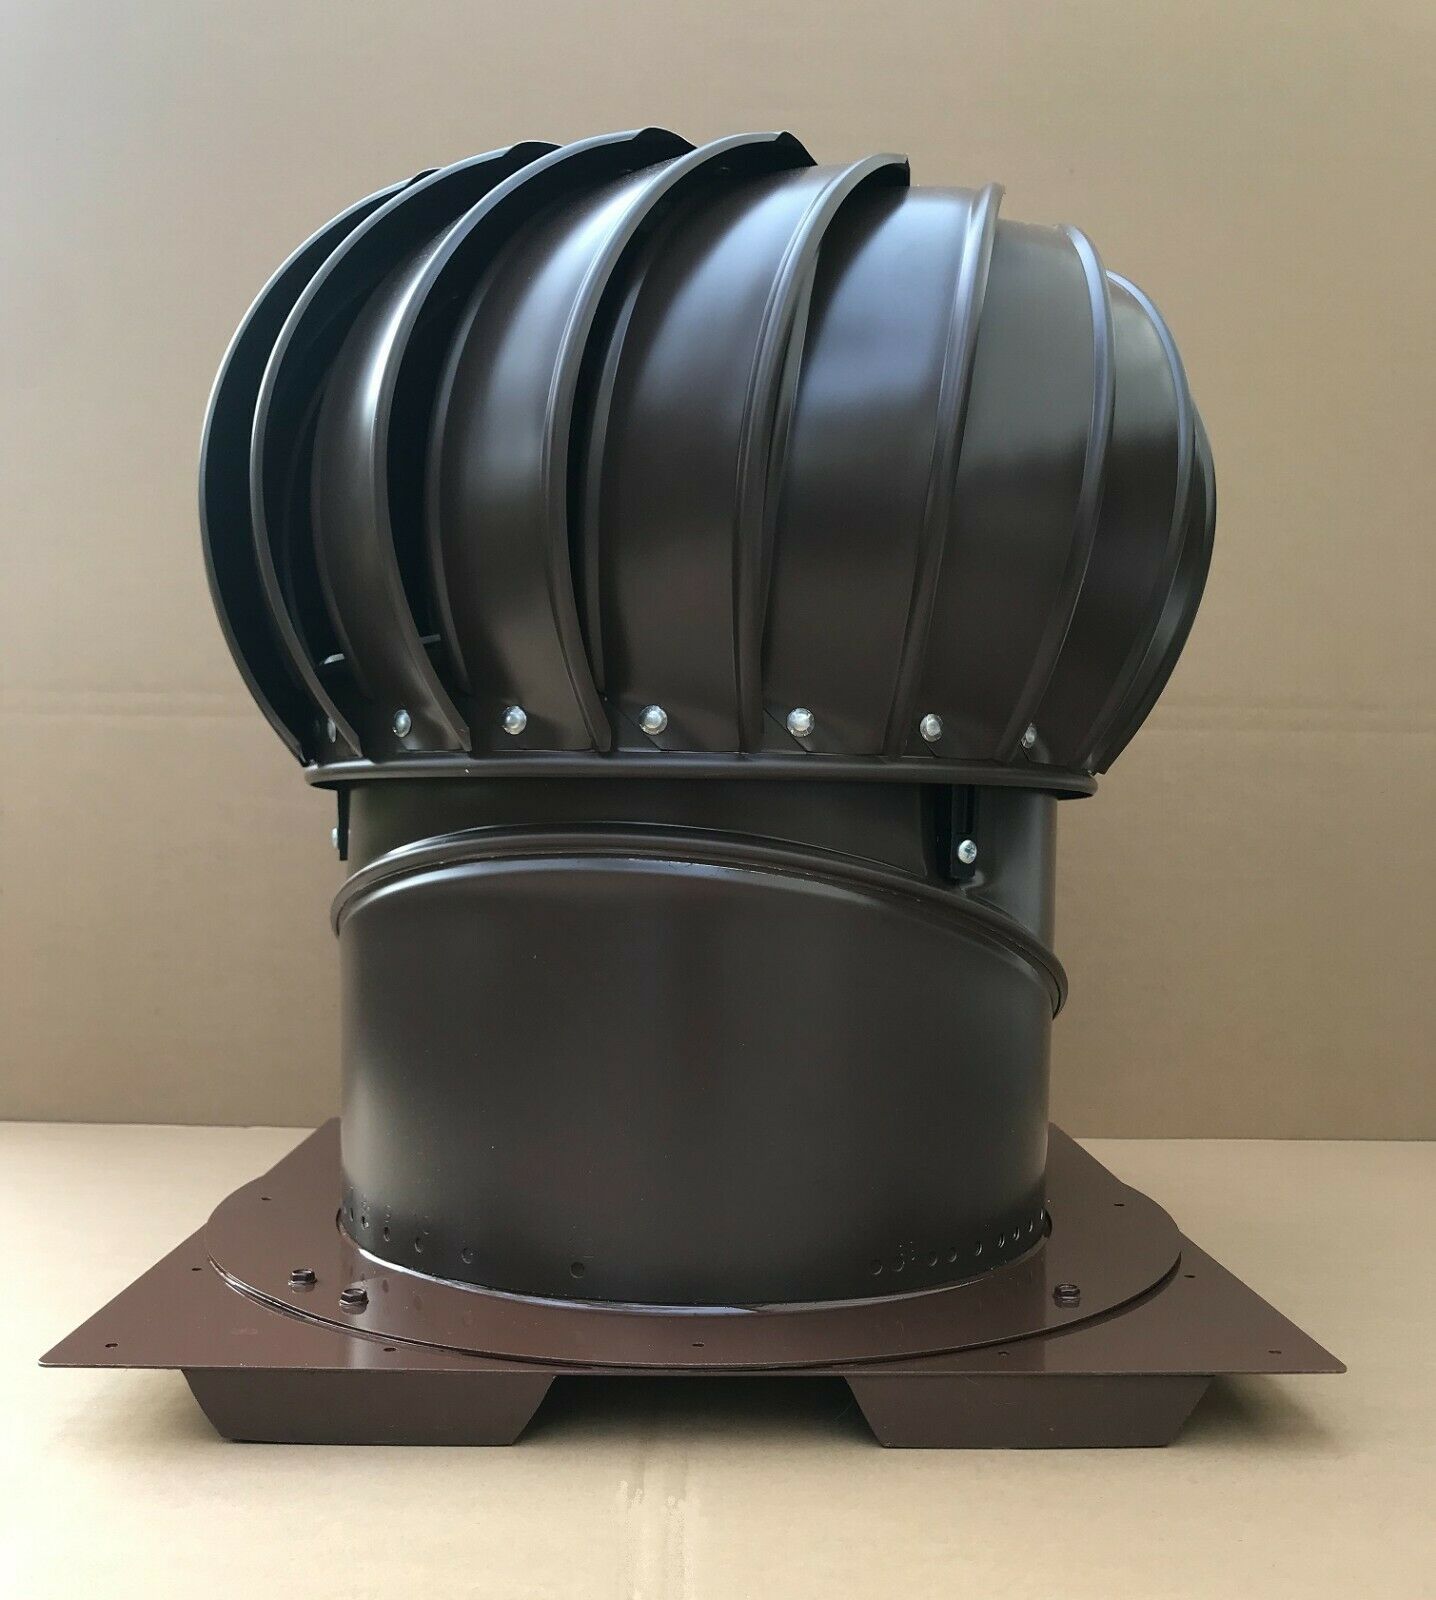
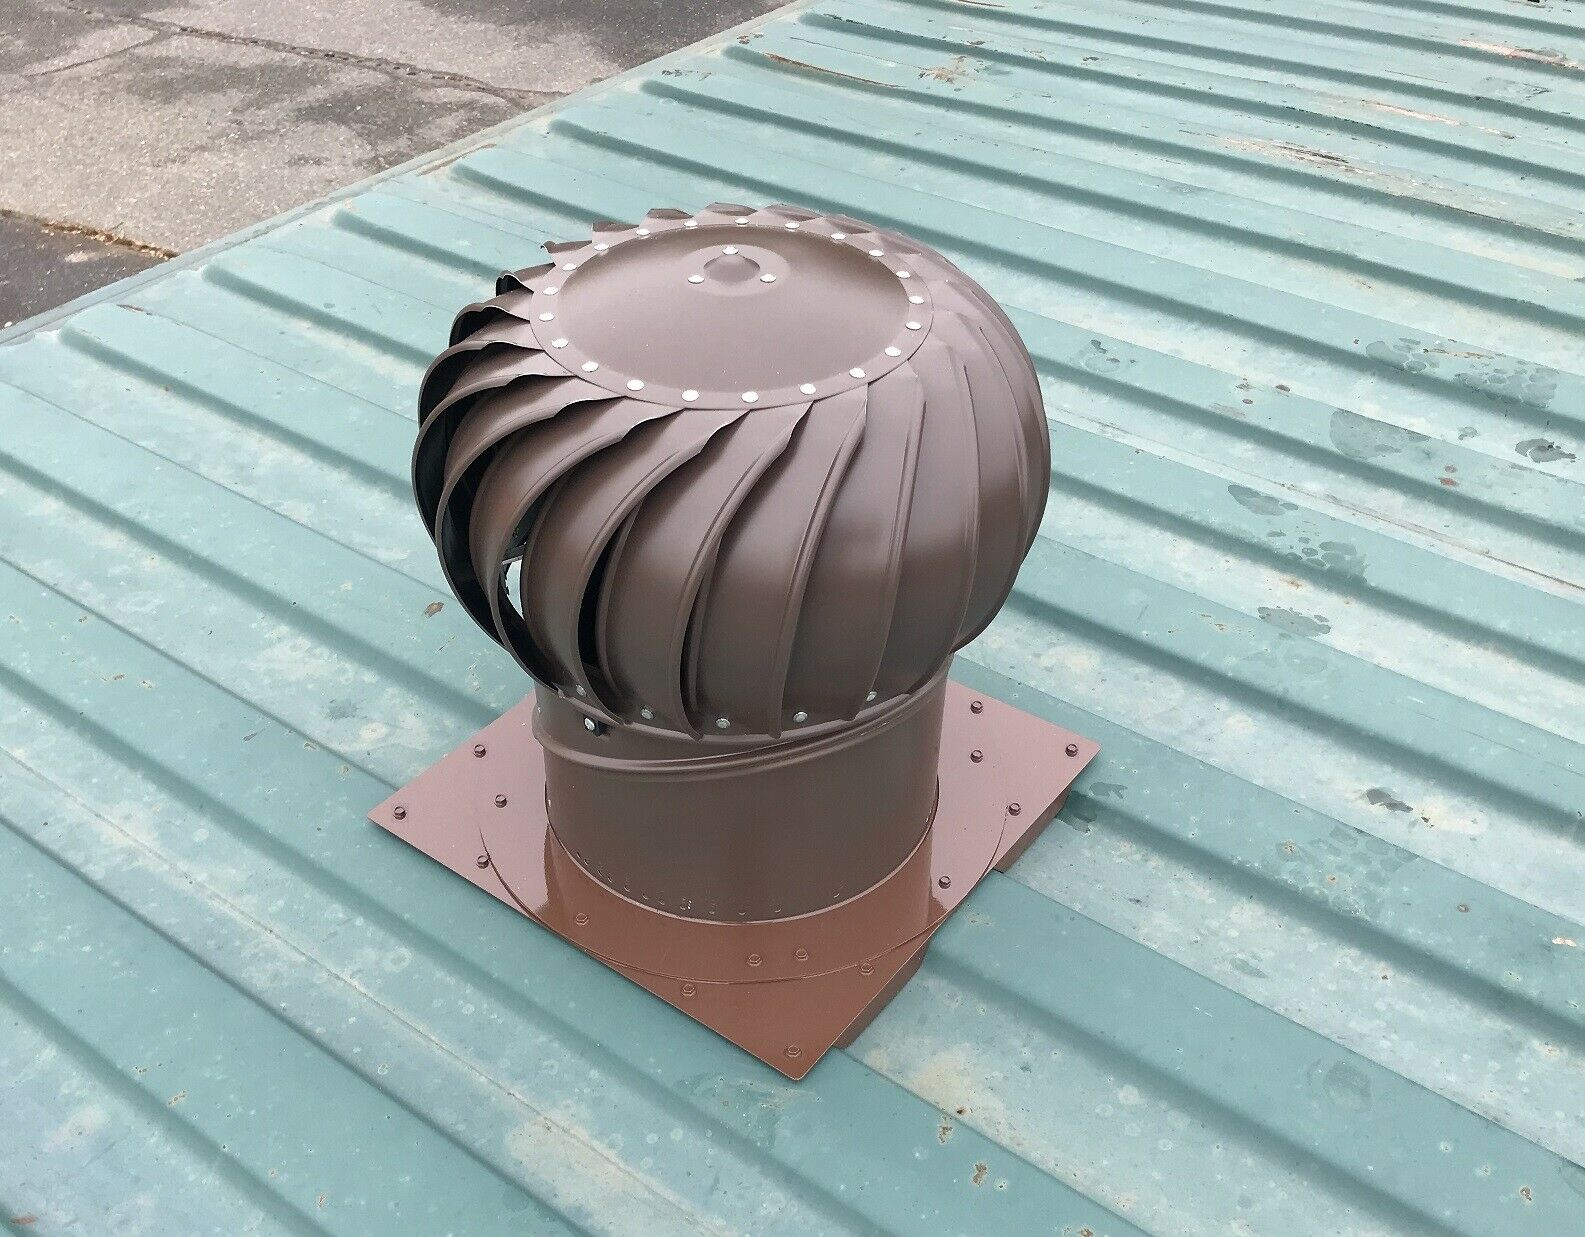
12" Aluminum Internally Braced Turbine Vent for Shipping / Storage Containers
$ 89.23
- Description
- Size Guide
Description
12" Aluminum Internally Braced Turbine Vent for Shipping / Storage ContainersVentilation is key for steel containers!
If you plan to store equipment you don't want to get rusted or damaged due to moisture and heat inside your storage container, you need to ventilate it sufficiently. Remember, that uniform air movement throughout your entire container is important.
Wind turbines are a type of exhaust vent that make up half of a balanced ventilation system for your storage containers.
You will need intake vents down low as well for fresh air to enter your container so the hotter air rises and exhausts out of the vent on your container's roof.
Together they help remove any built-up heat and moisture inside your container for year-round ventilation. We recommend that you install one turbine vent for 20’ containers and two for the 40’ containers. Keep in mind, even in hot and humid days with no wind turbine vents still let the hot air and moisture escape but they require wind to operate to their max capacity. If your container is located at hot and humid environment with little to no wind then you should consider installing our
365 CFM 5-Watt Solar Powered Roof Mounted Exhaust Fan
instead.
Features:
-Prevents tools from rusting in containers because moist air is being removed
-The vent itself always works as a passive vent 24 hours a day, wind or no wind
-Excellent choice for removing radiant heat from your storage container
-Helps remove hot, moist air faster than a passive vent alone
-Helps promotes uniform air movement throughout the container
-Part of a balanced ventilation system for year-round airflow
-Helps to fight heat and moisture buildup, minimize mold/mildew growth inside as well as ice dams in cold climates
-Improves your work space by removing the hot, oven-like temperatures in a container
-Makes a container into a cooler work environment
-Improves the air quality in containers by promoting fresh air movement
-Helps to reduce energy costs
-Easy to install (see the installation guide)
-Multiple fans installed on a large container don't leave hot spots
-Installs from the roof top
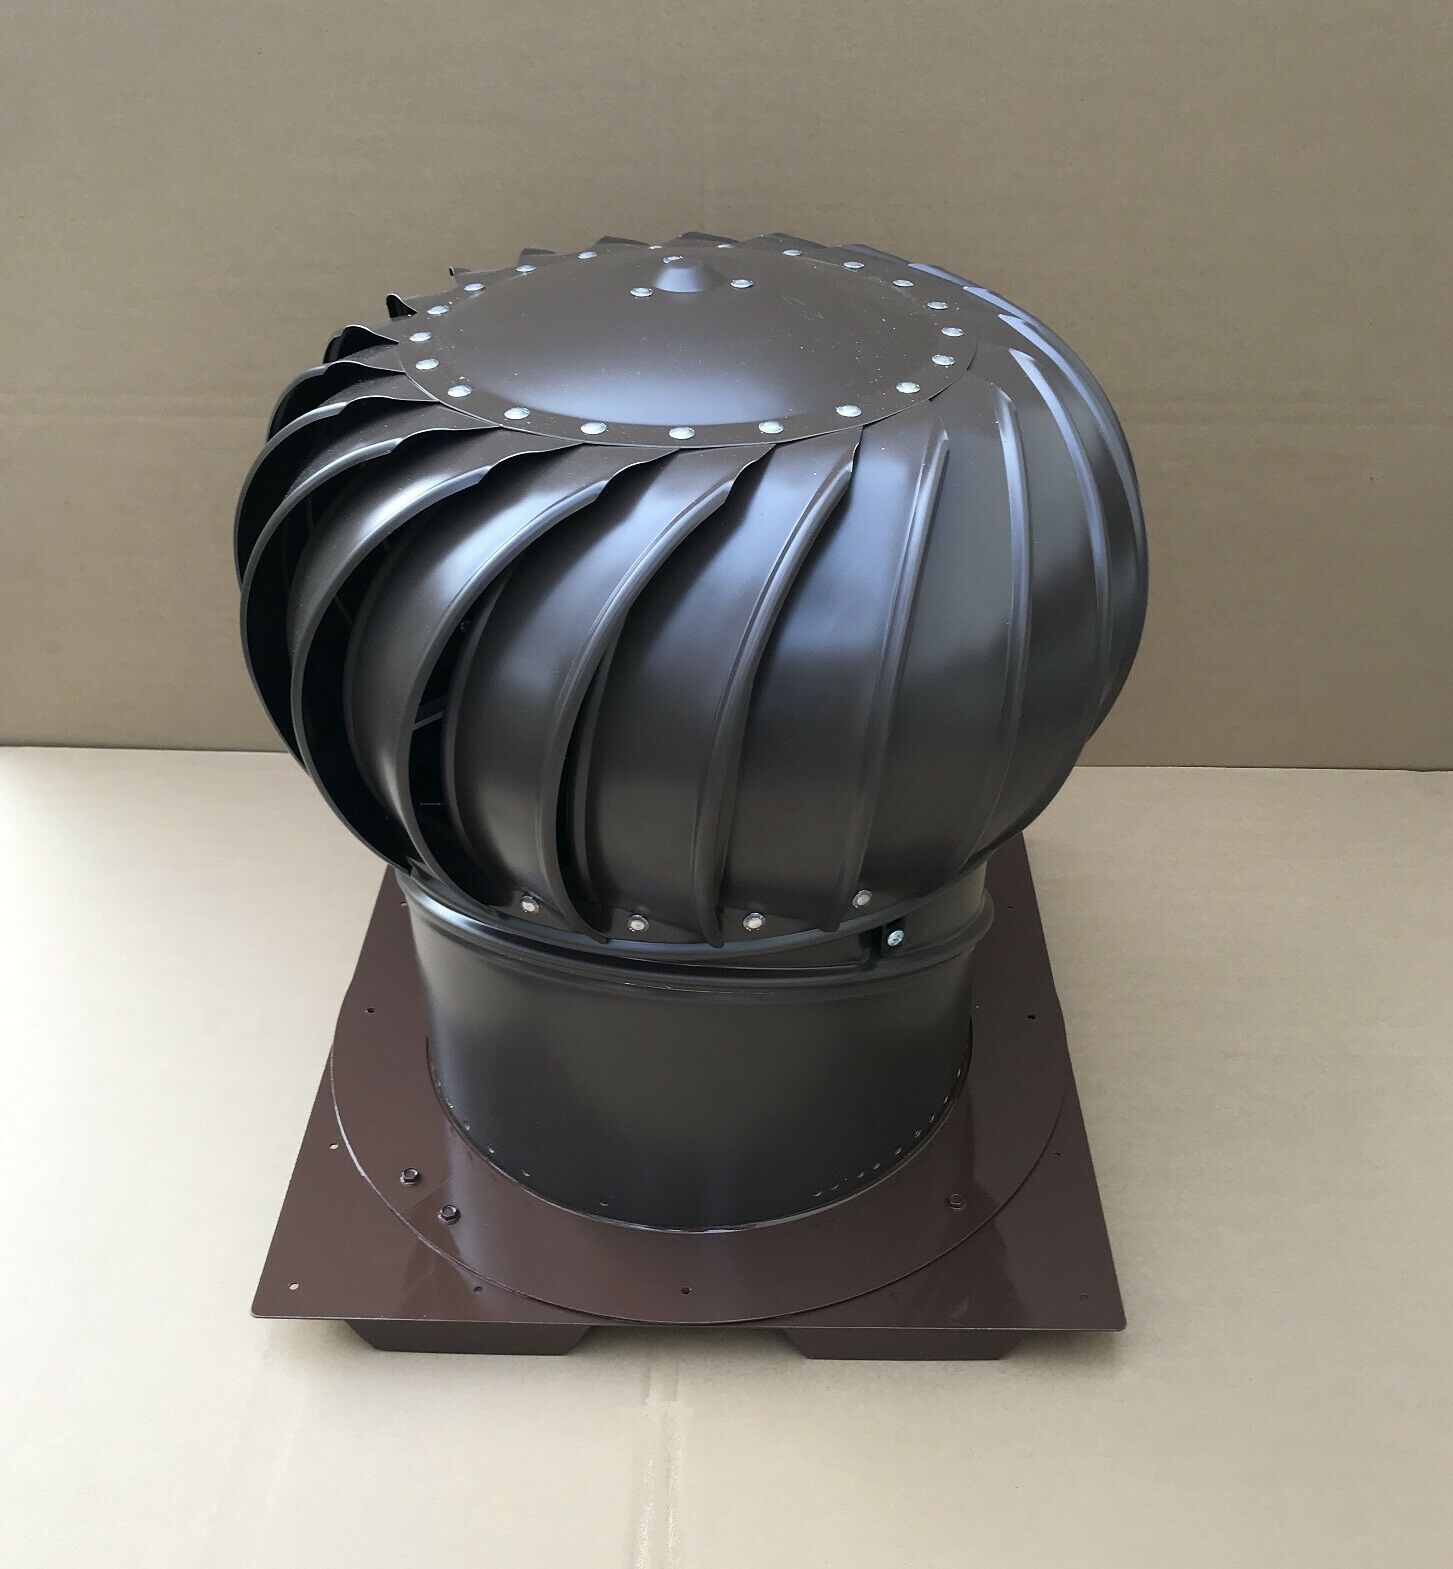
-Turbine head and base design
-95 Square inches of Net Free Area airflow each
-Maintenance-free top and bottom dual bearing system
-Aluminum construction
-12 inch round opening for optimal airflow
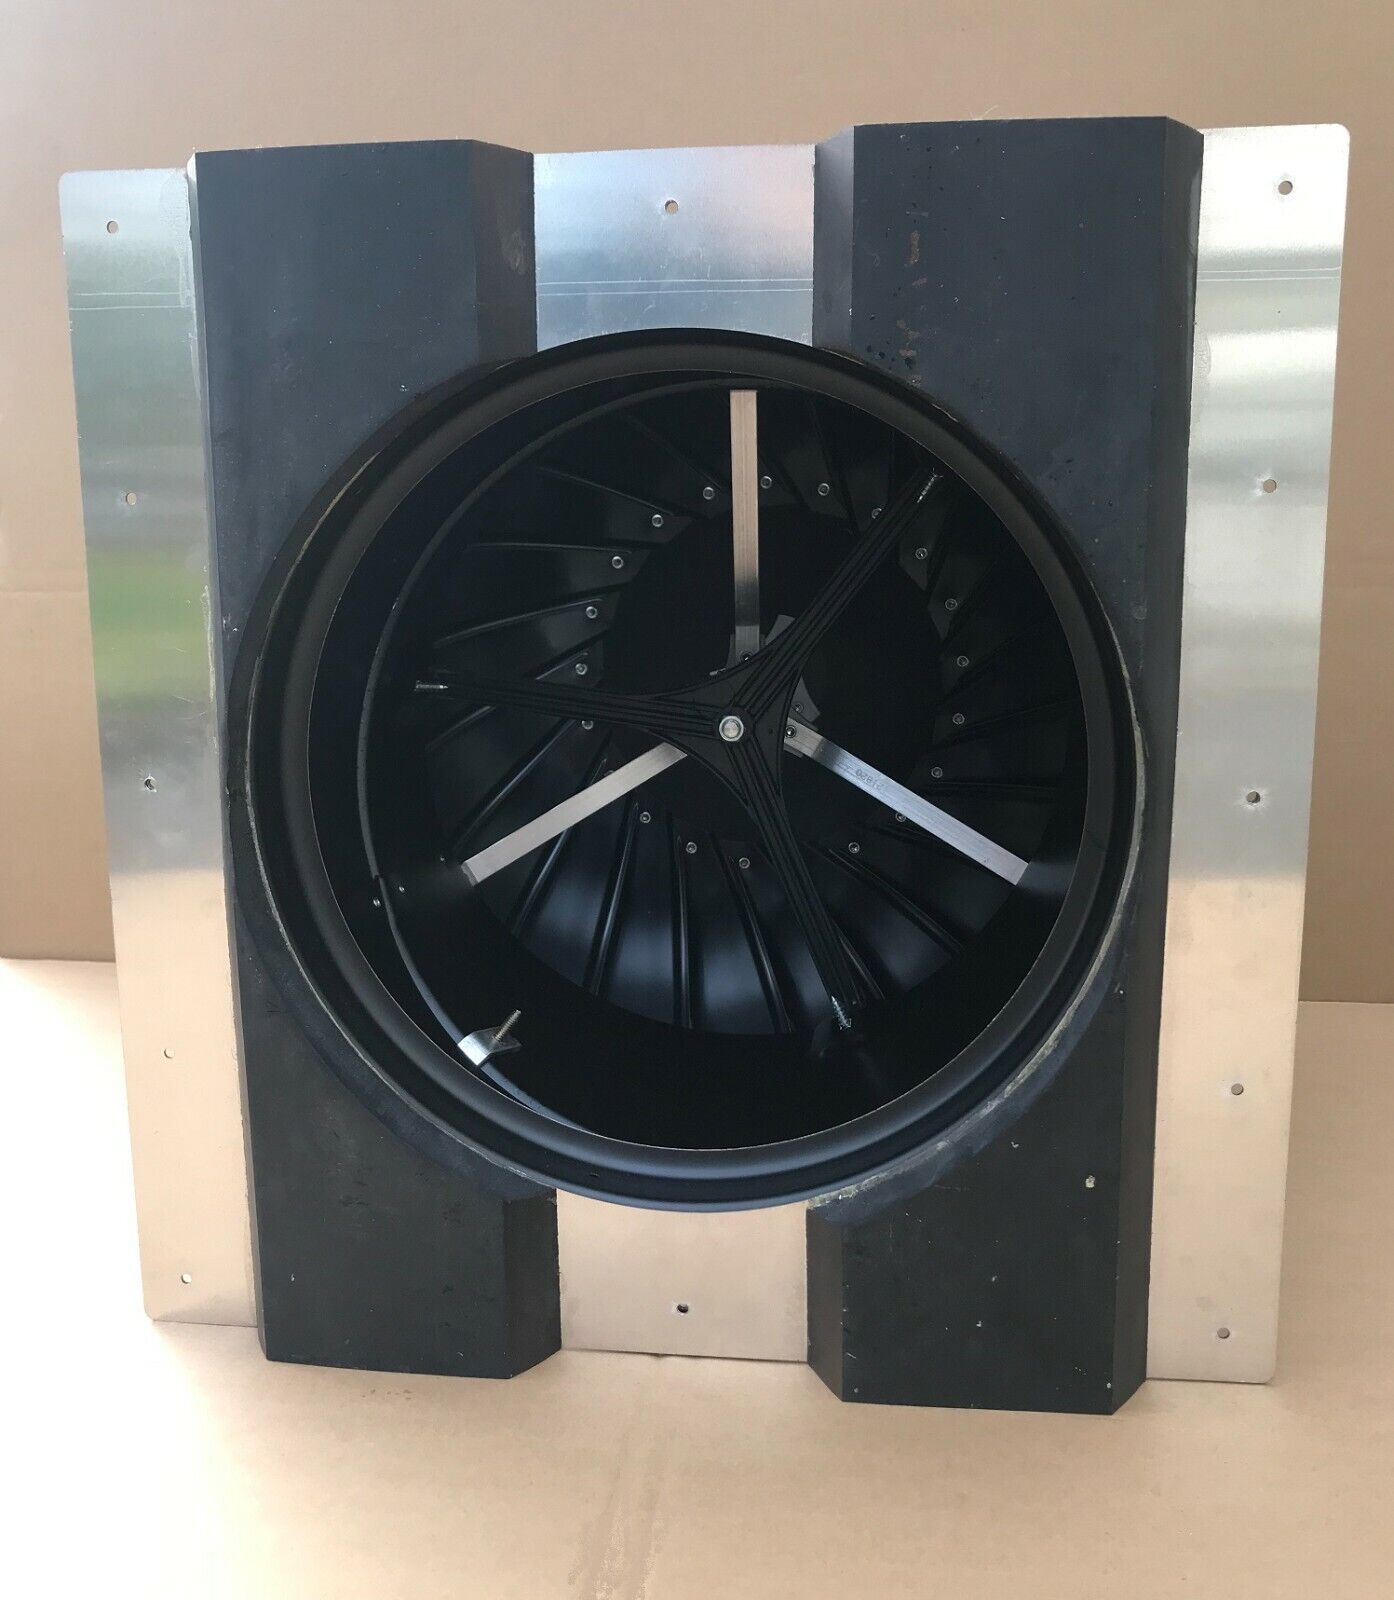
-Heavy-duty metal bracing system, internal spider adds stability.
-Durable Brown /
Weathered Bronze
color finish
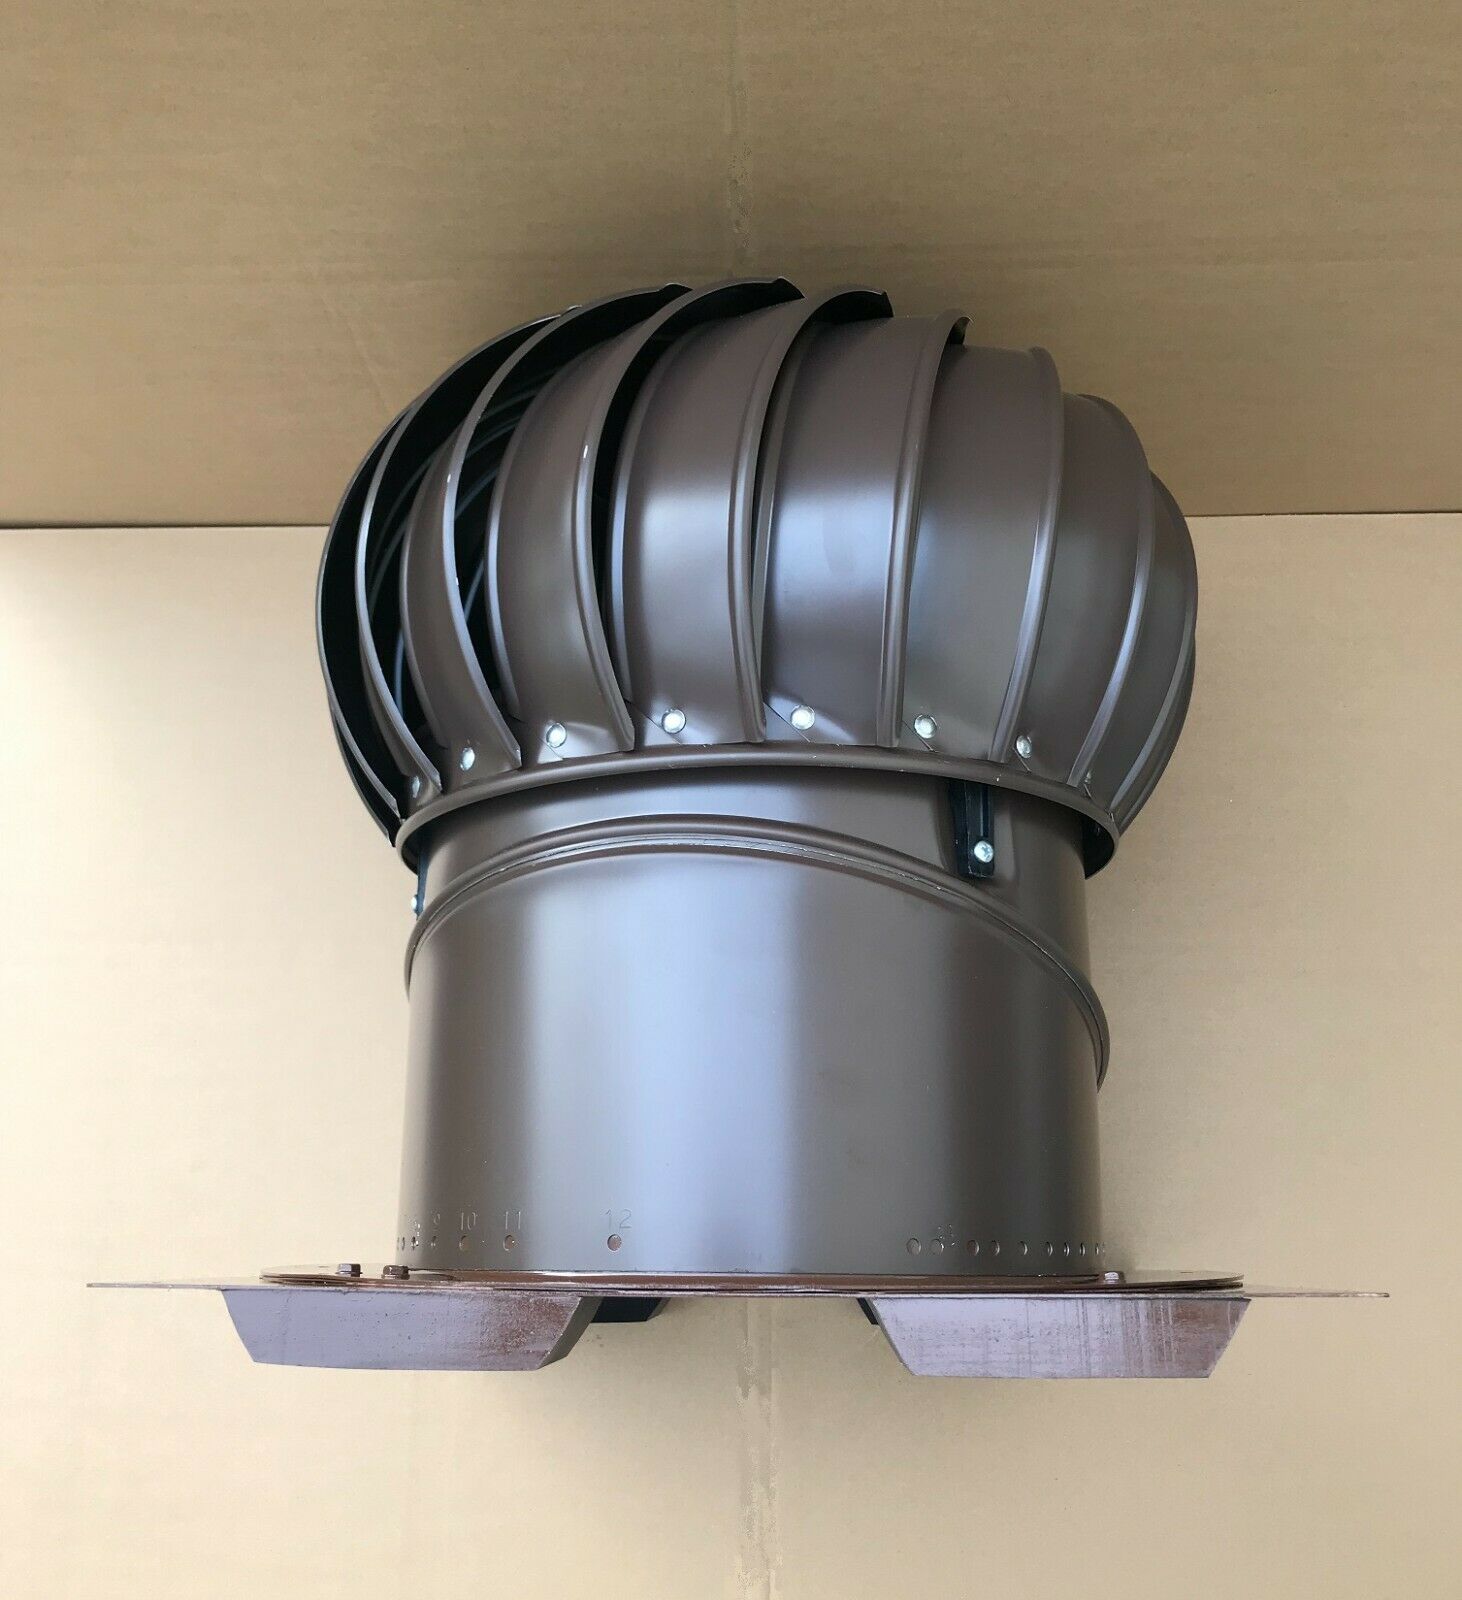
-16.3”x16.3” large square turbine base is specifically designed to
fit
directly onto your shipping container roof corrugation and
holds turbine securely to the storage container roof
. Just like all of our products this turbine vent is designed to be quickly and safely installed with a strong water tight fit saving you time and money.
Installation Instructions:
STOP!
Before you start to install your turbine vent please read the entire instructions.
This product has sharp edges that can cut your hands. Wear canvas gloves during installation and handling. Use care when handling unit to prevent damage to the precision-balanced rotor blade.
To ensure your safety, always use eyewear and hearing protection. Keep your hands clear of blades, grinding discs and drill bits. If you are not proficient in the use of power tools, you should find professional help to cut the hole. Make sure you have all the tools and materials you will need. Check the weather, although the installation should take about 45 mins, allow yourself 1 to 2 hours to complete the installation.
This turbine is ventilating purpose only and under NO circumstances should it be installed on a chimney or other hot stack or vent as a draft inducer.
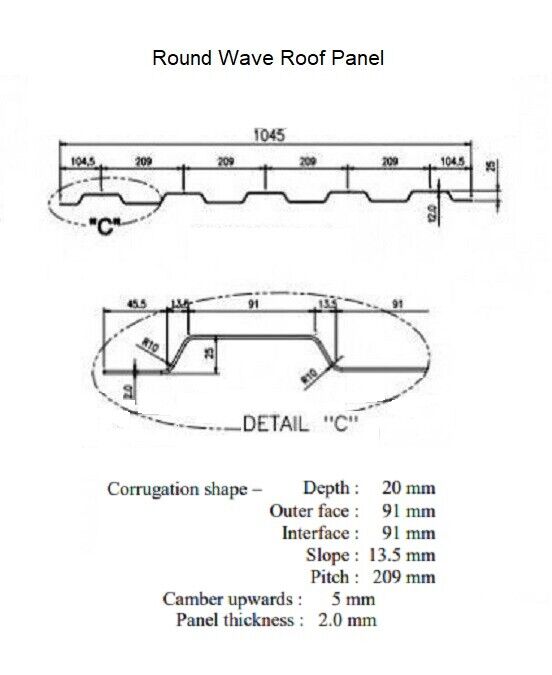
Although for the most part they are even, every cargo container roof has slight deviations in the corrugated spacing. The turbine base has durable
rubber strips that are
specifically designed to
fit
directly onto your shipping container roof corrugation and
accommodate minor deviations
.
If you are installing one turbine vent on a 20’ container the center of the 8’x20’ roof (10’ from each end of the container) where you should install it. If you are installing two turbine vents on a 40’ container then each vent will be located 10’ from the closest end of the container and they will be 20’ apart. These measurements are recommended but do not have to be precise. You should check various locations on the roof to find the area that fits the best. Avoid seams and any place that looks uneven due to dents or heavy warping.
Here is a list of tools/supplies you will need:
Grinder with 1/8” max thickness abrasive cutoff wheel (Reciprocating saw with metal cutting blade also can be used)
Drill, Center punch, Drill bit 5/32”
Rag, abrasive pad, pencil, acetone, masking tape, measuring tape,
5200 marine-grade adhesive sealant,
caulk gun, gloves, ear and eye protection
- Once you have selected a good location to mount your turbine vent, place the turbine vent base in the selected area, make sure the corrugations are centered as best as possible, and carefully pencil a line on the outside edge of the base to mark location. This will be a 16.3” x 16.3” square. Using painter’s masking tape, mask ¼” outside of the pencil mark. Mark the screw holes. Small gaps are OK, it will never be perfect so you should still proceed with the installation. The corrugation profile strips will conform to the container.
- Move the turbine vent base aside and take note of which way it is facing. When installing, the unit should face the same way to match the marked screw holes. Although the supplied screws are self-taping it is better to center punch the holes and drill them first using 5/32” drill bit.
- Find the center of the 16.3” x 16.3” square you pencil marked and draw a 12” diameter circle. This will be the hole that you will cut.
- Using a grinder with a maximum 1/8” thick cutting disc, start your cut then follow the line to cut the 12” diameter circle hole with your reciprocating saw.
If the shipping container has been retrofitted with electricity or gas, make sure not to cut through the wires or pipes.
You can also use a drill and bit same size as your reciprocating blade to start your cut. We highly recommend using the grinder with cutoff wheel. If you do not have a reciprocating saw you can cut your entire hole with the grinder.
- With the abrasive pad, thoroughly scuff the roof from the tape line to edge of the 12” diameter circle hole you just cut. This will prepare the roof to bond with the turbine vent base.
- Using
5200 marine-grade adhesive sealant
, apply two parallel 3/8” beads ½” from the masking tape and from the edge of the 12” diameter circle hole and another bead in between them. It is important to use enough adhesive to make a good seal. There should not be any thin areas as water will find its way through. Adhesive should ooze from 100% of all side edges when the screws are tightened. If you have some minor visible voids in adhesive, it is perfectly acceptable to back fill thoroughly with the 5200
marine-grade adhesive sealant
.
- Using care, center the turbine vent base, lining it up with the previously marked and drilled holes, and ensure that the turbine vent base is facing the same when you marked the holes.
- With the self-taping screws provided (Total of 16 pcs; 12 short and 4 long) with your turbine vent, screw in the turbine vent base by first loosely setting screws in to holes. Longer screws to be used where there is corrugation profile rubber strips between the aluminum turbine vent base and the roof panel and the shorter ones where the aluminum turbine vent base is in contact with the roof panel directly. Starting with the center corrugations,
half tighten all of the screws alternating from one side to the next so that the flashing mount seats uniformly then tighten them completely in same order.
If installed properly, there will be adhesive visible outside the vent base after it is screwed down to the roof.
- Use a stick or old credit card to remove excess adhesive then r
emove the masking tape.
- Place the adjustable collar onto vent base and secure them with the 3 (#10 x 1”) sheet metal screws provided. You storage container should be sitting level but for whatever reason if it is not you should loosen the locking clamp and turn the top of the collar counter clockwise to a level position and tighten locking clamp once it is level. Using caulk, seal all seams and screws. Position the turbine onto the collar, locating the vertical legs into the collar slots. Install 3 (#10 x 1”) sheet metal screws through the vertical legs and into the extruded holes in the collar. Tighten the screws firmly, but do not over-tighten to the point that the screw strips out.
- After completing installation, check to make sure the turbine turns freely. The turbine may have shifted in transportation. If necessary, gently pry lowest point of turbine upward to remove any wobble.
Congratulations on a job well done! These installation instructions allowed you to successfully and permanently install your
12 inch Aluminum Internally Braced Turbine Vent
to your storage container.
You will experience the benefits for years to come.
*This information is supplied in good faith but without recommendation as to its use. No guarantee of results of any use of the information is to be implied, since the conditions of use are beyond our control.
If you have any questions please ask and get an answer first before you buy.
CONTAINERS ARE AVAILABLE NATIONWIDE
*Price varies by location
Please click on my store and
check
out the accessories we sell for these containers.
